HaskHell TryHackMe Writeup
HaskHell Walkthrough
This is a writeup to the HashHell CTF on TryHackMe.

1. Enumeration
After we start the machine and connect to the THM network, we start with the enumeration.
So it’s port scanning time:
nmap 10.10.XX.YY
· nmap… the port scanner
· 10.10.XX.YY… the IP of the victim machine

Hmm what is this on port 5001? Lets check it out with the -sV flag:
nmap -sV -p 5001 10.10.XX.YY
· -sV… activate service and version checking
· -p 5001 … only check port 5001

Ahh okay, it’s a webserver.
We can access it by typing “10.10.XX.YY:5001” in our browser.

A lot of boring stuff, but automatically graded code?? Seems interesting… So whats the homework?

Ok, some basic stuff. We should take a look at the submit panel…

Well, this should not be this way…
So maybe the professor used another submission page. We can search it, using ffuf:
ffuf -u http://10.10.XX.YY/FUFF -w PATH/TO/WORDLIST
· ffuf … the fuzzer
· -u http:/etc. … the ip to attack
· FUFF… The place to fuzz
· -w PATH/…. the path to the wordlist containing the words we are looking for
There are some other fuzzers to, but I prefer ffuf, because it is the fastest.

This looks right.

Okay, so it’s time to get a reverse shell. I am using this site to generate my shells, because it is really simple.

Select Haskell
Past the code in a file and upload it.

Make sure you name it XYZ.hs. Otherwise it wont work.
Then set up a listener:
nc -lvnp PORT

And there we are!
2. USER.txt
Now we have a shell, but it isn’t really beautiful. So there are a few commands to make it nicer and activate the arrows/tabs.
UPGRADE SHELL:
/usr/bin/script -qc /bin/bash /dev/null
control+z to background
stty raw -echo; fg
export TERM=xterm
We have to locate user.txt, so we are simply searching for it:
find / -name user.txt 2>/dev/null
· find … the command
· / … search in the whole system
· -name user.txt … search for something named “user.txt”
· 2</dev/null … don’t show error(like no permission)

And there it is, ready to read.
3. Root it!
Sooo just one step and we are done. Get access to the root account. Let’s check the basics:
· sudo -l? Nope, we don’t have a password
· SUID? Nothing interesting
· crontabs? No I’m sorry…
· Files we can read, but aren’t supposed to read? YES!
Let me explain: It is kindy weird, that we can read user.txt inside the prof home directory, so I thought maybe there is something else we can read. Like passwords or ssh files. And I was right: we can read profs private sshkey.
cat /home/prof/.ssh/id_rsa
Just copy paste it to your machine, give it the right permissions (chmod 400 id_rsa) and log into profs account via ssh.
ssh -i id_rsa prof@10.10.XX.YY
Btw, you don’t have to copy the ssh file, you can simply copy the content via ctrl+C.

And we are in!
Now I would upgrade the shell again.
And check the basics…
· sudo -l?

Wohooo, but how can we exploit it?
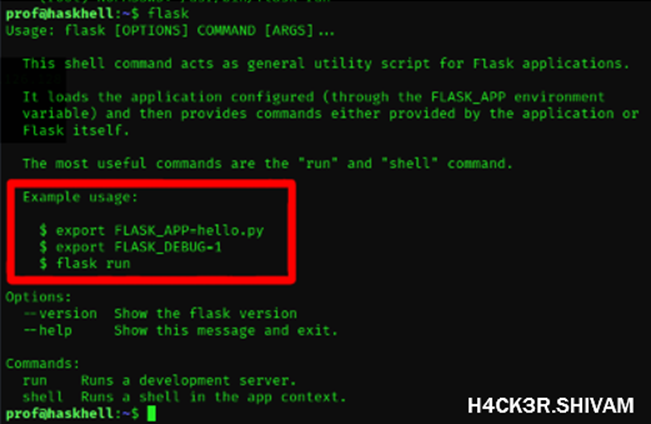
Hmmm, if we have a little bit luck…

I made a small script and did what flask told me. Then I run it with sudo privileges and BOOM, I am root. Then simply read the root flag in the root directory and this is it.
