TryHackMe Jeff Writeup
Jeff Walkthrough
In this post, I would like to share my experience and walkthrough on Jeff Room.

Overall, I have taken a few days just to complete this machine and it’s a HARD machine to play with.
Let’s Start!
We need to deploy the machine for us to play with the machine.

Once the machine is fully up within 5 minutes, we can start information gathering on the machine by executing the command nmap -sC -sV <IP Address> -PN

From the nmap result, i found out that the following port are open:
- 22: OpenSSH 7.6.1p1
- 80: nginx
From my experience, we need to add the IP and domain within the /etc/hosts
Let’s check what is stored inside the website.

The website looks pretty plain with the link is cannot function at all.
Let’s start to enumerate the website by executing the command dirb jeff.thm and hope that we found something useful.

Oh wow! We got /backups/ directory and i can assume that there will a file on this backups directory. I will do a random guess that backup.zip is save on this directory. Hope my guess is correct!

Let’s see the backup file and see what stored inside. However, the file has been protected by a password.
Let’s get the password by using the command fcrackzip -v -u -D -p /usr/share/wordlist/rockyou.txt backup.zip

Now, you can unzip the backup file using the password that we got from output above.

We got a password for the WordPress login access. Assuming that, we can predict that CMS WordPress is been stored on the machine. My bet would be that WordPress is included in the domain of the machine such as wordpress.jeff.thm

And cross finger that we got the wordpress page

We got it! What a guess! We should be able to access wp-admin in order for us to login into WordPress with credentials as below:
- User: jeff
- Password: <The same password that we found in wpadmin.bak>

Next, we need to copy-paste the PHP reverse shell on 404.php configuration the WordPress themes

Once we change the IP address and port, we can click the Update File Button for it to edited successfully.
Before we access the link on the browser, we need to start the listening port in the order to return to us. If not, it will appear something like below


We can refresh the browser if you have access the website without starting the listening

We have successfully access the server via www-data privileges access.

Let’s read the ftp_backup.php file that stored in /var/www/html. I found out the Host IP, Username and Password where we will use that information inside a python script.

Disclaimer: I didn’t own the Python Script above. I found the script by doing some research on the internet
Once we have filled up the information on the Python Script, we can transfer the file on the target’s machine just like follows:

After we have complete getting the file on the machine, we need to change the permission of the file to executable by running the command chmod +x <filename>.py

Before we can execute the files, we need to start listening as normal.

Now, we can execute the Python Script and it might take some minutes to fully return back to us

While waiting for the shell coming back to us, let’s have a coffee. Normally, it will take a minute if everything been executed perfectly.

We got the access as backupmgr user privileges and let’s check the user.txt whether we can already read the file by going to /home/jeff

Sadly, we cannot read the file because the permission is denied. Let’s go and get the permission to read the user.txt

We found systool been stored in /opt/systools/ directory but we also see one file called message.txt. I’m curious about what is written inside the file.

So, let’s restore back the backup file that might store in /var/backups directory.
We will need to delete message.txt in this directory and I will talk about it later on.

After we have deleted the message.txt, we need to access the backup by going to /var/backups

I found jeff.bak stored here and let’s access /opt/systools directory and execute the following command
ln -s /var/backups/jeff.bak message.txt

Let’s run ./systool command and key-in number 3 after entering the number 2

The password is shown above been assigned for jeff user privileges. However, you need to enter the command below in order to use the “su” command
python3 -c ‘import pty: pty.spawn(“/bin/bash”)’
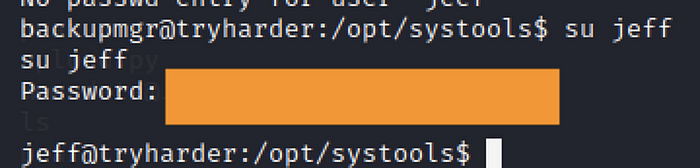
Now, we access the server via jeff credentials. Let’s try again to read the user.txt

We need to decode the md5 hash for us to gain the actual user flag

Let’s check if we be able to escalate user jeff can access to root

I found that crontab is running for jeff and we need to run the command sudo crontab -e and we see the interface as shown in the screenshot below

We need to key-in :!/bin/sh when we see the interface at first sight. For us to get the terminal look, we need to use bash -i

We are in the machine as root and we can access to /root/ directory to read the root flag

That is all!!